Creating Squid Game Decor with Epoxy and Laser Cutting
Last Updated: May 2024
I am a nerd and often use media I like to inspire projects. Squid Game was extremely popular this year, and I, like many, am anxiously anticipating a second season.
To test my maker flexibility, I wanted to make some decor inspired by Squid Game. For projects like this, I like to use techniques I want to incorporate more in the future, like our laser and epoxy.
Affiliate links are used on this page. See my disclosure page for info on affiliate programs.
Tools Used
Materials
Maple scraps
Plywood Scraps
Epoxy Mica Powder Pigment
1 - Laser and Paint Shapes

I started by cutting the shapes out of hardboard for each project on our laser. Since we were cutting several shapes out, the laser saved time and was precise the first time. If you don’t have a laser, you can cut the shapes out with a scrollsaw or coping saw
Once you cut the shapes, add a coat of white spray paint. Mine were a little rough, so I sanded them and applied a second coat so the finish was smooth.

2 - Cut Frame Scraps to Size
Two projects have frames, so I used wood from my scrap bin instead of purchasing new material. Rip 1/2” strips from some solid wood that will be the frame itself, allowing it to be ~1” thick. Cut 1/4” plywood to the interior size of each frame.

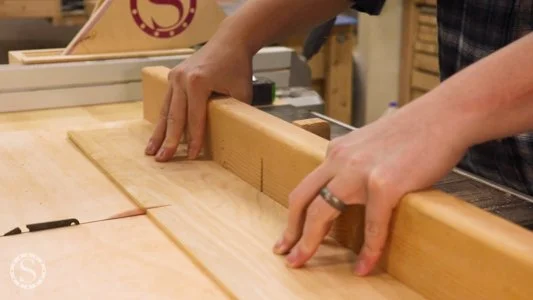
Cut a 45-degree miter on one end of each frame strip. Hold it to the plywood and mark where the inside miter angle should start. I found it easier to mark and cut each of these individually instead of trying to measure and cut them all at first.


3 - Assemble Frames
Once you cut the pieces out, assemble them with wood glue using tape and some clamps to keep everything together until dry.


Once dry, add a small bead of silicone to every interior corner. This will ensure the epoxy does not leak out accidentally during the pour. You can also add your shapes to the frames using some CA glue. I debated whether adding these first or pouring epoxy and then adding the shapes was better.
4 - Attempt Epoxy Pour #1

Set up your pour area with cups, gloves, mica powder, and silicone mats (epoxy won’t stick to silicone so that cleanup will be easier later). Mix the epoxy for a minute or so before adding pigment. Use the color and white glitter powder for both for a somewhat glittery look like I had. Make sure you have all your colors ready before the pours as well.
Pour the epoxy and allow the colors to swirl to your heart’s content. You can also use some stir sticks to help with the swirl. If the shapes are already glued in, do not cover them with epoxy.


The epoxy can be poured directly in the frames. For the coasters, I used round silicone molds that I also poured directly in.
5 - Wallow in Self-Pity
About halfway through the coaster pour, I realized my frames were not level, and my epoxy pour was starting to tilt and overflow the shapes. I did everything I could to scrape the epoxy off the shapes and even used a cup to remove some of the epoxy to lower the levels.
Messing up one of the signs was not fun, and I thought I completely ruined the project. Fortunately, this wasn’t for a commission, and I’ll use the error as a reminder to level epoxy pours in the future.


6 - Epoxy Pour #2 to Fix #1
Fortunately, I was able to salvage a sign and all the coasters. Once the epoxy was dry, I mixed some more, added more pigment, and tried to fill in where the first pour had let some of the wooden frame backers show through.
The coasters were a bit easier. I double-checked the level and then added a thin, clear coat of epoxy. This allowed me to pour over the shape while still allowing it to show through.


7 - Apply Additional Styling
The last bit of styling was to add some “blood” splatter with red paint. Squid Game is quite a violent show, so it seemed appropriate. I found that adding some water to the brush before adding paint helped the paint spatter more realistically. You can be as subtle or aggressive as you want here; just make sure the shapes still show through.


Overall, the projects did not turn out badly. There were some issues during the builds, but they were lessons I will keep with me for all future epoxy projects. Sometimes, the best way to learn and get better is to try something new and mess it up a little so that you can continue to improve every time. I don’t foresee ever forgetting to level my work surface before pouring more epoxy.