Shed Transformation: From Basic Kit to Functional Storage
Last Updated: May 2024
My garage is having an identity crisis. Although I want it to be a workshop, it still thinks it is a garage. To help remedy this crisis, I need to get as many “normal” garage items out of the shop as possible. The best place to do this is a shed in our backyard. To do this, I decided to buy a shed kit and modify it with some additions you just won’t find in any kit.
I planned this project early in 2021 when lumber prices were skyrocketing. At the time, buying a shed kit costs less than enough raw material for a comparable build. In addition, I purchased the shed kit before material became more scarce, which was ahead of shed prices increasing following material prices. Later, in 2021, the prices started coming back down. Do some pricing research to see whether you’ll save money by buying a kit or raw material. Factor your time into it as well. It took an hour (including filming time) to assemble the shed, but it would have taken at least a long weekend to build from scratch.
Affiliate links are used on this page. See my disclosure page for info on affiliate programs.
Materials
Shed Kit (this is the exact one I used)
Concrete Pavers / Stepping Stones
Pallet Wood or Scrap Wood
3/4” Carriage Bolt
Solar Shed Light (newer model)
3/4” Outdoor Screws
1 - Create the Foundation
To circumvent our HOA, the foundation needs to be as solid as possible, but technically, not permanent. Before starting to dig, have all utility lines marked. The last thing we want to do is dig into a water or gas line.
Select your paving stones so the foundation will be larger than the shed. Once sized, dig out an area a little larger than the foundation to give yourself some additional room to work. Once you have dug it out, add some dirt back where necessary to level the area. Use a tamp to pack the dirt back down and double-check for level.


Install landscaping edging to keep the foundation in place while everything dries. Before securing all the pieces, make sure the liner is square. Pour some paver base, pack it with the tamp, and check for level again.


Add the pavers, keeping a 1/4” gap between them. I started in one corner and expanded from there, which will help ensure even spacing. Use a mallet to settle each paver to lessen the chance of accidental movement.


Once I placed all the pavers, I used a hand spade to pour polymeric sand between each paver and the edging. I swept away all the excess and dampened the sand with water. The sand will harden and keep everything in place, but it will technically be removable with enough force.
2 - Assemble the Shed from the Instructions
All sheds are going to have different assembly steps and instructions. The one we got was assembled with exterior screws only. Add a bead of clear silicone between all exterior joints for some weather-proofing.
If some of the screws are not long enough (some of mine were not), use exterior screws where needed.
My kit was pretty easy to assemble, but some pieces look similar. It might be easy to assume you know how to assemble it, but at least loosely follow the directions.


3 - Install Solar Lighting
Running power to the shed is entirely overkill, but having some lights is always helpful. To avoid constantly changing batteries, I opted for solar lighting.
We’ll start with the interior light. Install the solar panel to the roof with a healthy layer of silicone to keep water from leaking through the roof. Drill a hole large enough to pass the power cord through in the back of the shed, under the roof. Feed the cord through and secure it on both sides with cord clips. Fill the hole on both sides with silicone to keep water from getting in.


Inside, install the light on the roof. If your shed has shelves like mine, install them on the open side (the light will travel into the shelves better this way). My shed roof had some ridges I needed to work around with a scrap piece of pallet wood. Once I installed the light, I tidied up the excess cord against the roof with cord clips (zip ties can also be helpful here).

Moving to the exterior lights, install the solar panel to the roof with silicone and screws. Run the cord down the back and to one side of the shed. Pound the spike into the ground with your mallet and add the light. Don’t worry about the angles yet. Wait till it’s dark so you can get the look you want. Run the cord around the back of the shed and install the other light in the exact location on the other side of the shed.

Once the lights are installed, tidy up the cord with cable clips and screws. If you have any excess cable, Hide it on the back of the shed.
4 - Build a Folding Table
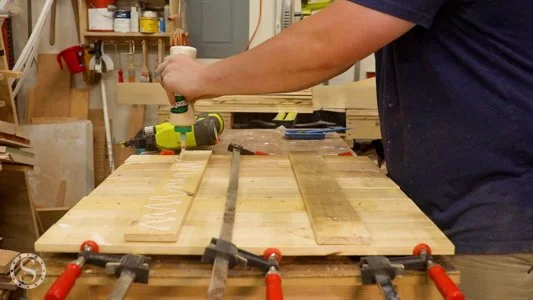
Take the remaining ripped pallets and assemble the table. Like the bin, we’ll use exterior wood glue and add cross pieces with glue and brad nails.


For the folding support, you’ll need three pieces as wide as the tabletop, one half as wide, a small scrap, and a long piece for the diagonal. You’ll also want to cut two scraps to 1” x 3” for the latch. Assemble one wide piece and the half-wide piece to make a right angle. Add the small scrap on the end of the short piece on the same side as the long piece.
Build the support so the vertical piece is on one side and the diagonal and horizontal pieces attach on the other side. I did not do this and had to go back and correct it after finishing the video.
Place your long diagonal so both corners are fully covered (don’t worry about the overhang) and secure with glue and brad nails. Use your oscillating multi-tool to trim the diagonal flush. It’s much easier to add the diagonal and cut flush than try to figure out all the angles, cut, and adjust.


When the glue is dried on all pieces, remove the excess glue and run over all pieces with your sander.
5 - Install Folding Table
Install one of the pieces as wide as the tabletop where you want the bottom of the tabletop to be. Install directly into the door with wood glue and brad nails. Install the other vertically below and off-center, centering one edge to the door. Give the glue an hour to dry.
While the glue dries, cut the piano hinge to size using your angle grinder or hacksaw. You’ll want the pieces to be roughly the same size and span almost the whole tabletop width. Install one hinge on the horizontal door piece facing up and the other on the vertical piece with the hinge facing the center of the door.


Add one of the 1” x 3” scraps centered on the top of the door. Drill a slightly oversized hole in the end of the other scrap and install it to the door with a screw. Don’t tighten the screw too much so that the scrap can pivot. The scrap will keep the tabletop in the up position while the door is closed.
Install the tabletop in the up position (clamps make this easier). Put a screw in each end, make sure it moves as expected, then install the remaining screws. Since the screws are so close to the edges of the tabletop, predrill the holes. Pivot the tabletop up and make sure the latch works as expected.


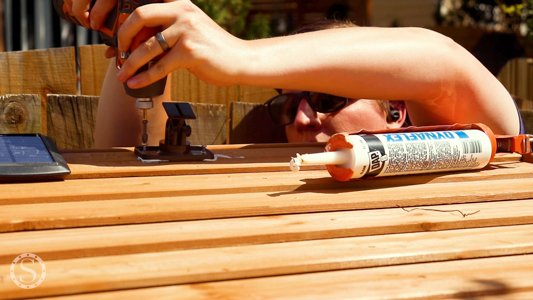
Add the support to the vertical hinge. Again, install with two screws only at first to double-check the hinge and height. You’ll want the support to be about an inch below where you want the bottom of the tabletop to sit. Once verified, install the remaining hinge screws. Drill a hole in the center of the end of the support and add the carriage bolt. The bolt will let you fine-tune the final height of the tabletop.


If you want some extra credit, take another scrap and drill a hole just larger than the head of the carriage bolt. Add it to the bottom of the tabletop where you want the support to hold it up (it should be centered on the width).
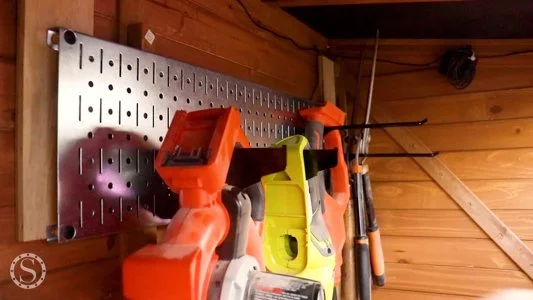
6 - Install Wall Control Panel
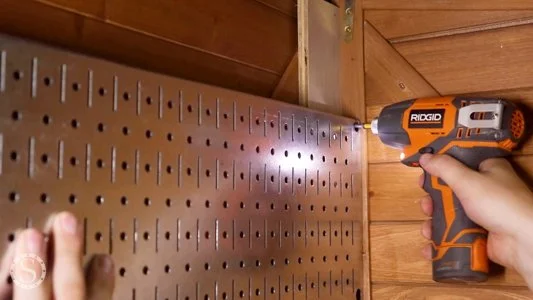
Many people throw things in their shed, accumulating junk you have to go through or find more room for. I’ve liked having the Hanging Wall Control Panels above my workbench and wanted to bring some of that organization to the shed, so I purchased a smaller version of the panels.
To help with spacing from the ceiling, I cut two scraps to the same height and installed them to the shed's back wall with brad nails (glue not needed). I then installed the Wall Control panel to the scraps. These also helped offset the panel from the back a little bit to go in front of some structural supports in the shed.

7 - Add Additional Security and Safety Features
Because we’ll be storing some items that can be dangerous for kids and our neighborhood has many kids, we’ll add some extra security to keep them out of the shed. I removed the flimsy latch on the shed doors and replaced it with a heavy-duty security hasp.
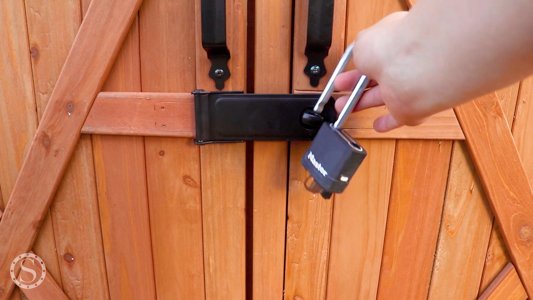
Once I added the hasp, I could lock the shed with a heavy-duty padlock. Now, honestly, this shed isn’t super secure. If someone wanted to steal from it, they could do so without too much trouble (and with a screwdriver). The heavy-duty hasp and padlock are “security theater” to keep kids away from dangerous items. If you do want to keep your shed safe from thieves, you’ll need to add more secure hinges and hide the screws that hold the shed together.
I added the flimsy latches back to the shed but in different locations. The latches help keep each door closed in the wind, while the hasp and padlock keep it secure.
9 - Load Shed Up
Install two eyes on the near and far sides of the shelf-less side of the shed. Add a bungee cord between the eyes and add taller items like rakes and shovels. The bungee cord is easily removable but will keep everything in place and out of the way.
Figure out what items you want to hang from the Wall Control panel and add accessories for each. Start with the longest or most awkward items, then work to smaller and easier items.

Put any heavy lawn equipment in the shed so you know how much room you have left to work with. If you store something like a propane tank, add some eyes and bungee cords to keep the tank extra secure. I would not recommend storing regular gas cans unless you add extra safety features like metal panels.


Getting most of our “normal” garage stuff out of the shop will significantly assist in making the shop more usable. While I could not move everything to the new shed, I moved several items, taking up valuable floor and wall space.
If we did not have to contest with our HOA and one was available, I wish we had a little more room in the shed. An extra foot of depth, two feet of width, and maybe a foot or two of height would allow the shed to be less cramped and provide room for additional items.