Prototyping Project Builds
Have you ever been close to finishing a project, but a piece is a little too short or a feature didn’t work out how you planned? This happens to ALL OF US, but that doesn’t make it any less frustrating. Fortunately, there are three things we can do to help lessen the chances of running into issues and potentially ruining a finished project.
All three items incorporate lessons I learned last year when I took Mark Rober’s online engineering course.
Affiliate links are used on this page. See my disclosure page for info on affiliate programs.
1 - Get Your Ideas Out of Your Head

This can be anything including some sketches, a detailed note on your phone, some flashcards of features (one of Mark’s methods), or a scale 3D model. While each method has its strengths and shortcomings, for our purposes, the specific method isn’t as important. The key is to get your ideas out of your head so you can spend less energy remembering what you want to do and more time processing how you are going to do it.
Personally, I use a combination of methods to keep track of ideas. This combination is used for varying levels of detail as project ideas form and evolve over time.
All of my project ideas live in a master list within ClickUp, a project management tool. ClickUp syncs to an online database, so it is always available on my phone, computer, or online. Each project has some additional details such as how plausible it is, the type of project, a priority, any details I want to include for the project, and many other tags to help me keep track of content. ClickUp is great if you want to keep track of many details for a project (and specifically content), but if you just want a list, it’s overkill.
I am starting to use Mark’s flashcard technique when identifying what problems I want projects to solve as well as how to solve those problems. He goes in depth along with examples from his videos in the course. At a high-level though, once I have a type of project in mind (and usually a master problem to solve), I list every feature I could possibly think of for that type of project. The good ones get priority, then I think of the most creative ways to solve each one. For the features and solutions, I try to be as creative as possible and only pull it back to reality when looking at everything together.
Once I know what project I am working on, the features to include, and how to solve them (this usually includes some of Step 2 and 3), I usually make a scale model in Fusion 360. Fusion is really helpful because it is mathematic modeling based on parameters you enter. One of the biggest strengths is that you can change these parameters and your model will automatically update to reflect those changes (as long as the model is built correctly).
2 - Make a Physical, Small-Scale Prototype
For more complex projects, it can be helpful to build a small-scale, physical model. This doesn’t need to be anything complex and only needs to loosely function the same way the full-size project will. Being able to see and touch a model will often allow you to see areas you need to approach carefully or come up with additional ideas for the project.
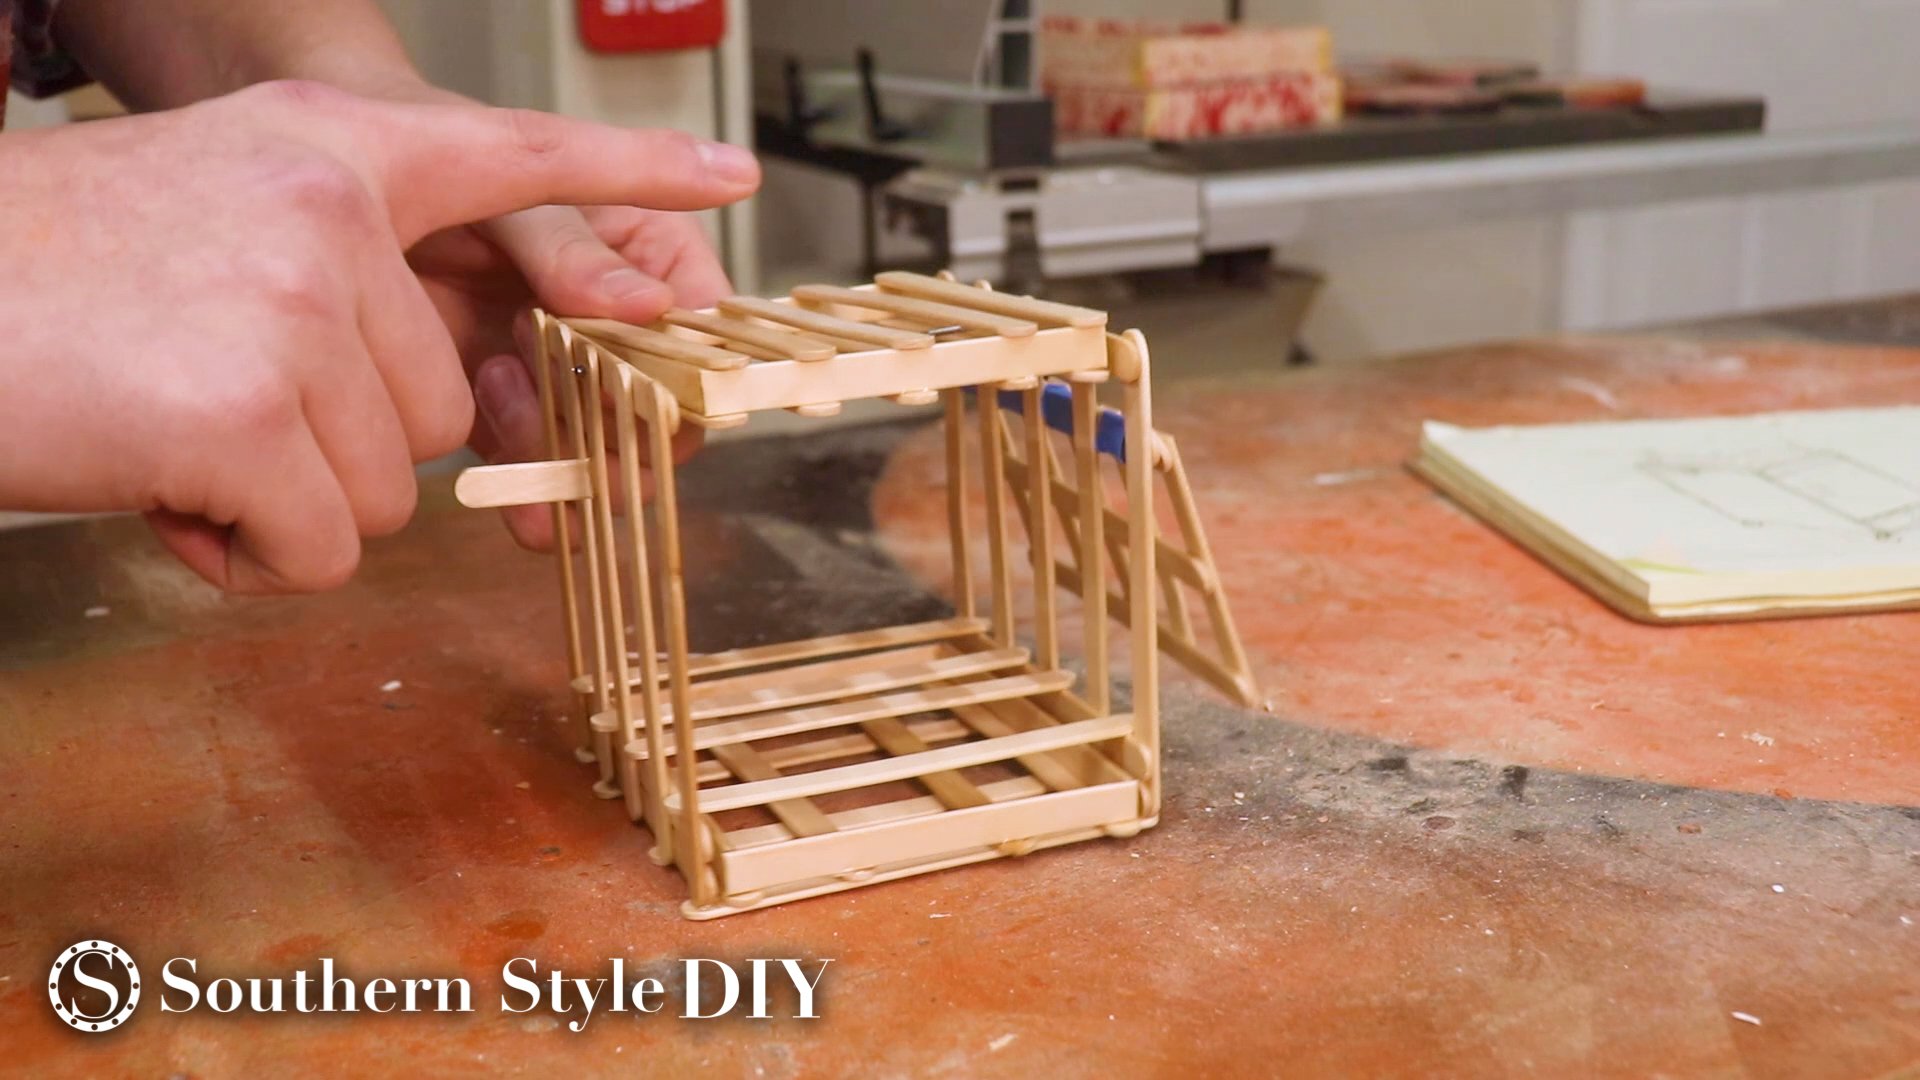
For the flip top stands, I made a very simple prototype out of popsicle sticks. When looking at the model, I immediately realized I needed to make sure the base and flip top were square and the holes for the pipe need to be straight. Otherwise, the top fill stick to the base when being flipped. The prototype also highlighted the open space on the sides that I can add additional features to. While these could be anything, I decided to add some extension cord storage to one side and a folding table to the other.
3 - Prototype Specific Features
For even more complex projects, specific features can be prototyped individually. Personally, I find I do this more often than making even small-scale prototypes. For the flip top stand, there are two big things we can prototype before we start building anything: the vertical clearance the tools need to flip and how much weight will the center bar support. For specific features, we can often test each independent of the others, then combine everything for the final build.
Flip Top Height Clearance

While you could make a scale digital model, for clearances you can also use scraps or some cardboard to get an immediate idea of what dimensions you need to work with. I cut some cardboard to the width of my planer and height of my sander. I nailed this cardboard to some scrap clamped to my workbench to simulate the tools flipping. If my pivot point was too low, the corners of the planer and top of the sander would rub on the bottom preventing smooth flipping (and potentially damaging the tools). By adding a couple of inches of height, I avoid both problems before risking my tools.
Center Bar Weight Test


When researching the project, I found some debate online about whether cheap, thin aluminum EMT conduit would be strong enough to support the tools or if the more expensive, thick steel rigid pipe was necessary. Instead of risking expensive tools, we can stress test the weight capacity of both.
I weigh more than the tools and any material that would be on top of them, so if the pipe can hold me, it will hold my tools. I also set two workbenches a little further apart than the flip top base will be and put my weight on the center of each pipe. This ensures we’re testing each pipe under more stress than they will be under in reality.
The EMT conduit bent almost immediately, but the rigid pipe didn’t budge. This confirms we do need to use the thicker pipe, even though it is more expensive. Performing this test is less expensive in the long-run though because the pipe is less expensive than repairing or replacing my tools. Better to know then risk it later.


Because I took some extra time to prototype my project head of starting the build, I ran into almost no issues with the build, which is awesome! The only issue was some hardware being backordered, but there is not a good way to test that ahead of time. The flip top allows me to put two largely stationary tools in the same space and have them readily available at all times instead of having to pull them out, set up, then use them. It also allows me to put them on casters to move easily and put both tools in the same space.
Making efficient use of my shop space is essential since I am working out of my garage. I also effectively used otherwise wasted space when I built some hanging Wall Control panels in front of my Tool Wall. Check out that project here.